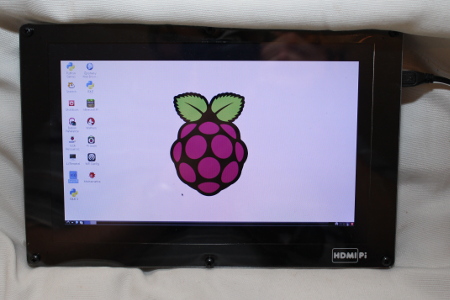
HDMI Pi – 9 inch screen for the Raspberry Pi
The HDMI Pi screen for the Raspberry Pi has now been made and is shipping to the kickstart supporters.
It’s been a long wait, although much of that is due to changes and improvements in the design and we’ve been kept informed about the progress. So was it worth it ? …
Yes!

The final specs are that it’s a 9inch screen (1280 x 800 LCD screen) with 2 x HDMI inputs (one of which is used for the Raspberry Pi), an internal supply connector (allowing you to power the Pi and monitor from a single power supply). There is also an audio out jack (taken from the HDMI audio stream).
I’ve just received mine. I’ve assembled it and got it working, but not had time to try it out fully yet, so this is an early review. I chose a black frame, it’s not the most exciting colour they offer, but is plain to allow it to be used for different purposes.
The screen comes in kit form and takes about 30 minutes to put together, but the process is fairly straight forwarded following a YouTube video. Most of the assembly is removing the protective covering on each piece of perspex and putting them together in the correct order (anyone with a Pimoroni case is familiar with that), with a couple of cables to connect (no more difficult than connecting a Pi camera). the whole assembly feels quite sturdy, there is a little flex on the side when pressing, but only a very small amount. It does include a perspex screen so care will need to be taken to avoid scratching – so no throwing it in a bag with anything metal.
The first version comes with a plate to fit the Raspberry Pi Model-B, although a version for the B+ will be available in future.
Even with the Raspberry Pi installed it is possible to get the ports and connectors on the Raspberry Pi, including the GPIO. You may need to make some slight modification with a hacksaw if you need to connect to an analogue TV although it’s unlikely you would want to use that compared to the HDMI screen. It can be a bit tricky to get to all the ports, although you can always unscrew the back panel and then screw it back in place.
I used the two USB ports for a Wifi USB dongle and a combined keyboard and trackpad, which meant I could use the Raspberry Pi without any cables other than the power supply and it didn’t need a USB hub.

I booted the Raspberry Pi with a new NOOBS install. It worked well, but didn’t quite fill the screen. The LXDE monitor configuration tool does not recognise the screen to change the resolution, but there are details in the instructions of how to change config.txt to fix this (not done in the above photos).
The screen is quite small so at the full resolution then the text is tiny. If you have good eyesight then you should be OK, but others may want to reduce the resolution to see the text larger (you can change the font size in many applications, but unfortunately there’s no easy way to increase the text size across the desktop and all applications).
There one small thing if looking to mount the screen. The Raspberry Pi protrudes slightly from the back of the screen (particularly the USB connector), so although there are mounting holes on the back for mounting it on a wall then it may be difficult to get it flush without another perspex layer or a cutout.
Screen settings for config.txt
The following are added to the /boot/config.txt file
hdmi_ignore_edid=0xa5000080

hdmi_group=2 # HDMIPi for 1280 x 800

hdmi_drive=2 # for alternative modes get sound

hdmi_mode=28 # 1280 x 800 @ 60 Hz Specifcations
Summary
This is a well designed screen that allows the Raspberry Pi to be installed to make it a nice tidy module with only one power lead. This is much better than the cabling spaghetti I had before. It is much better than I first thought from the initial Kickstarter and is good value for money. I’d highly recommend one, although you may want to wait for the next version …
Future version
The latest announcement is that there will be a 10 inch version in future with the possibility of it being touch screen. If you need a screen fairly soon (they will still take a while to ship) then I do recommend the current version, but the possibility of touch means it may be worth waiting for the 10 inch version.
More information
For full details visit:
