Raspberry Pi camera module part 2
When the Raspberry Pi camera board was first released it sold out within a day or so. Farnell have now got the second batch and are back in stock. Raspberry Pi camera board from Farnell.
I’ve previously posted some photos of our Bee Box Raspberry Pi project taken with the Raspberry Pi camera module. Since then I took some more photos of my study and workshop using the Raspberry Pi camera board.
I have a study in the house which I used for my software development and electronics, with a shed in the garden for the more heavy duty work.
All these photos have been taken using the Raspberry Pi camera accessory, and each one has at least one different Raspberry Pi and/or case in the photo – see if you can spot them all.
Indoors
My indoor study is a small box room in the house. It’s just about enough room for a computer desk, a desk (used for working on my electronics projects) and a bookshelf.

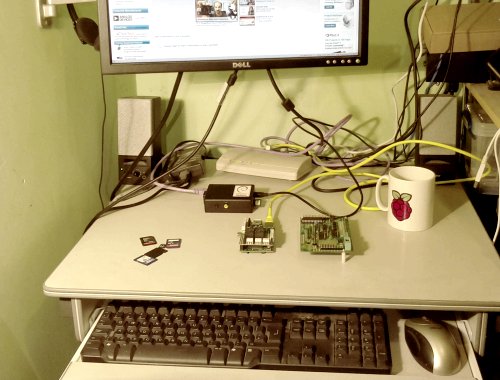
This shows my Raspberry Pi proxy server, a Raspberry Pi with PiFace digital and a Gertboard.
This is completed with essential Raspberry Pi mug to ensure a good supply of coffee.

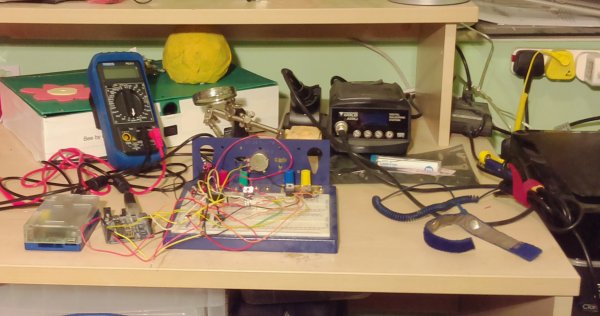
My electronics bench has a Raspberry Pi, Arduino project that I’m working on. There is a second Raspberry Pi (model A) in the Bee project at the back of the bench.
Also note the anti-static wristband used to protect sensitive components (such as the Raspberry Pi camera) from static electricity.
I’ve put the PiFace through some testing and have a possible project in the future that may use that. I’ve got the gertboard to help teach electronics to my children, but haven’t had chance to use it yet.

My bookshelf has a strong Unix / Linux and electronics theme throughout. As well as the Pibow case complete with Raspberry Pi there is The MagPi binder with issues 1 to 8 (I have written guest articles for the magazine, but in later issues) and a copy of Learn Raspberry Pi with Linux for which I was the technical reviewer.
Outdoor shed
My shed in the garden is used for the metalwork and other things best kept away from the computers. For security reasons and to avoid risk of damp against expensive hardware it’s only got some basic tools inside.


As you can see I have some work in progress. This is a case for a Raspberry Pi project, different to the one seen on breadboard in the indoor shot. The Raspberry Pi is mounted inside the case to identify where a hole needs to be cuto for the HDMI port, which will be drilled and then filed.
The camera shots are really good quality. There are two things that were important for these shots, the lighting and being able to hold the camera module still. These are of course important for any kind of photography, but both were a little tricky trying to get these shots.
The outdoor shed photo has been taken using only natural light (on a wet overcast day), but all the rest had artificial light used to ensure a crisp image. Without a firing mechanism for a flash the lighting had to be provided continuously whilst the photos were being taken.
Holding the camera still proved to be a little hit and miss. In most projects then I would expect that the camera would be mounted into a project enclosure which would be better than trying to hold the camera module whilst hitting enter on the keyboard to take the photo.
